Github Challenge
Welcome to the exciting world of version control and collaborative coding! In this introductory task, you will embark on a journey to explore Git and GitHub, essential tools for modern software development and teamwork. Completing this task successfully will earn you valuable incentive points, setting the stage for your participation in the eYRC competition. This is just the beginning. We require you to utilize GitHub for eYRC. Your progress will be continuously monitored throughout the competition, and teams will be benefited based on their engagement in GitHub.
Note: Before starting with the Git and Github. Go through the following video to understand them better.
So let's get started.
Installing Git
The installation of Git for Windows, Linux and MacOS is provided in the link given below: - Install Git
Now that you have Git installed on your system, next step is to configure.
Configure Username and Email
Enter the following commands on your terminal (for windows Git Bash)
git config --global user.name "Your Name"
git config --global user.email "youremail@example.com"
Creating a Local Repository
-
Navigate to your theme project working directory
-
Run to intialize a new git repository inside your project folder
git init -
Add your files to stage
- Add Specific Files or Folders: Use git add followed by specific file or folder paths to stage only those files or directories. This allows you to be selective about which changes you want to include in the next commit.
git add <file1.txt> <folder/> - Add All Changes: Use
git add .to stage all changes in your working directory. This command stages all modified and new files for the next commit. It is a quick way to include all changes.git add .
- Add Specific Files or Folders: Use git add followed by specific file or folder paths to stage only those files or directories. This allows you to be selective about which changes you want to include in the next commit.
-
Commit the changes using:
git commit -m "initial commit""initial commit" here is nothing but a message. Message should be something related to what the commit contains - maybe it's a new feature, maybe it's a bug fix, maybe it's just fixing a typo. Don't put a message like "asdfadsf" or "foobar".
Voila you have created your git repo. If you only want to keep track of your code locally, then you are good to go. But if you want to work with a team, you can use GitHub to collaboratively modify the project's code.
Setting Remote GitHub Repository
-
Sign In to GitHub: If you don't have a GitHub account, you'll need to sign up for one at github.com/signup. If you already have an account, sign in.
-
Create new repository:
- Once you login to GitHub you can click on "New" at the left hand side of your dashboard or you can go to the following link: github.com/new. You will see following interface:
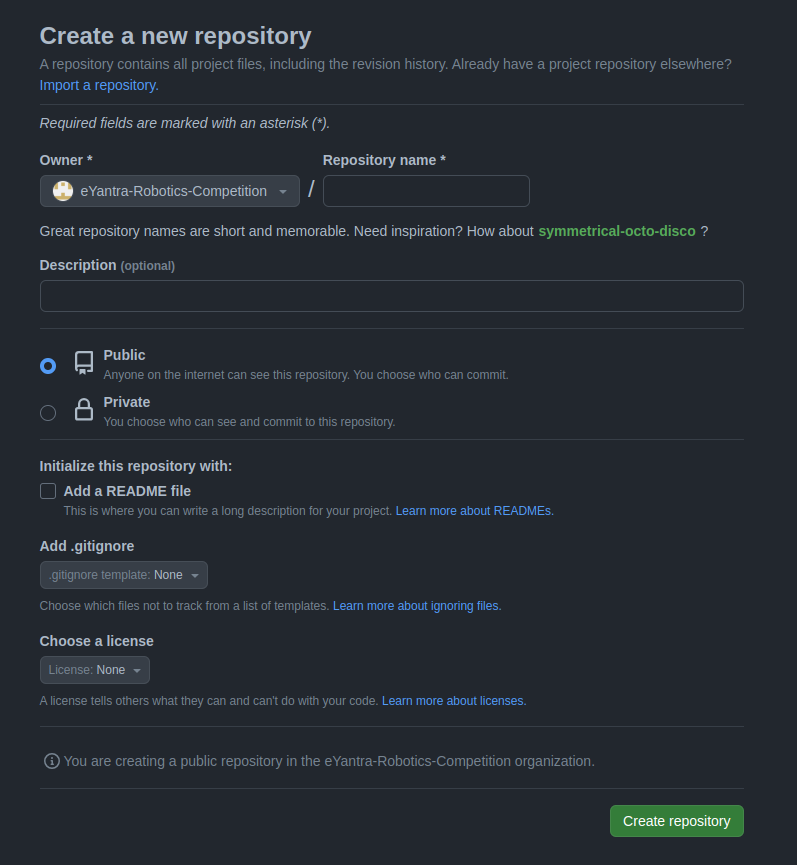
- Next step is to fill in the details and create you repo.
- Owner can be anyone from your eYRC team
- Repository name should be as per following convention:
eyrc23_<theme-initials>_<team-id> - Make sure Private is selected when you are creating the repository
Warning: you will be disqualified if your eYRC repository is public
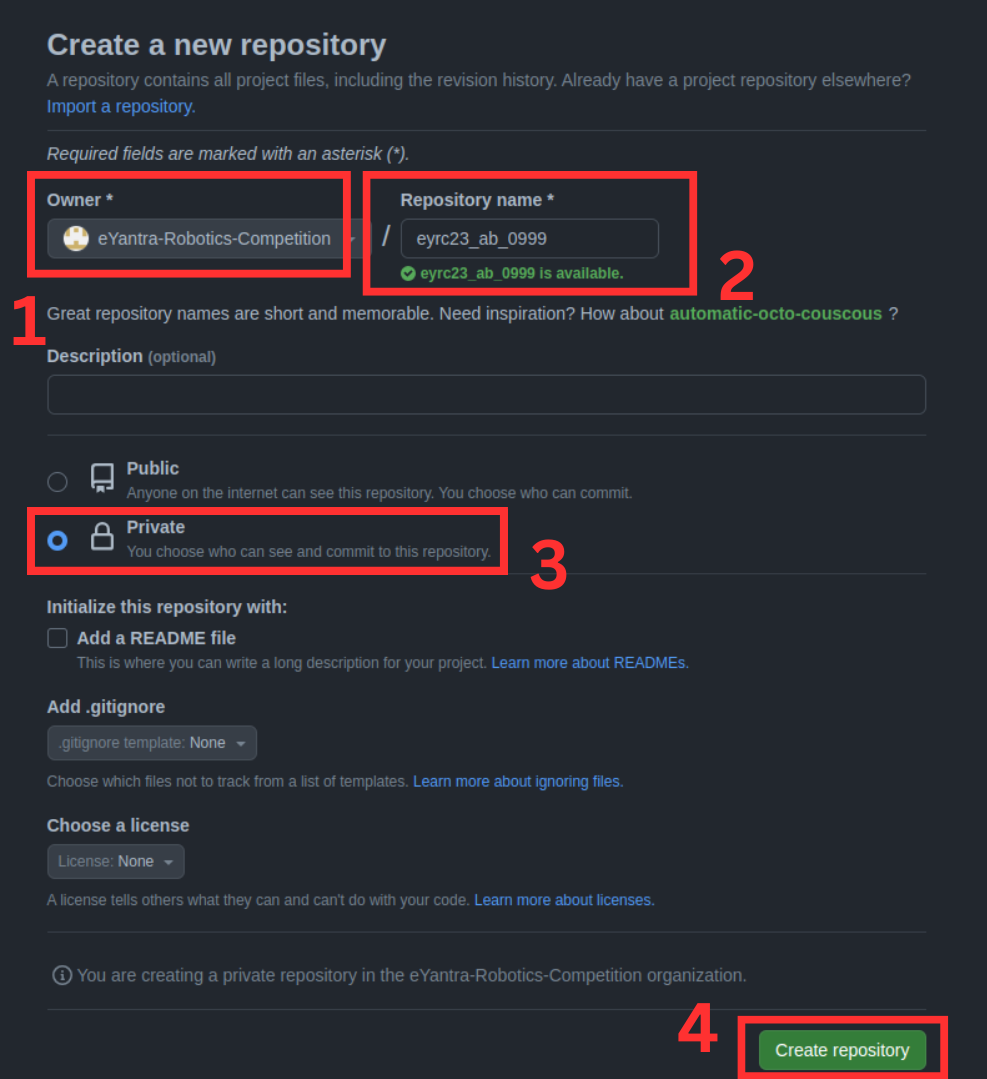
-
Add Collaborators to the Repository:
- Once you create Repository, you will land on following interface
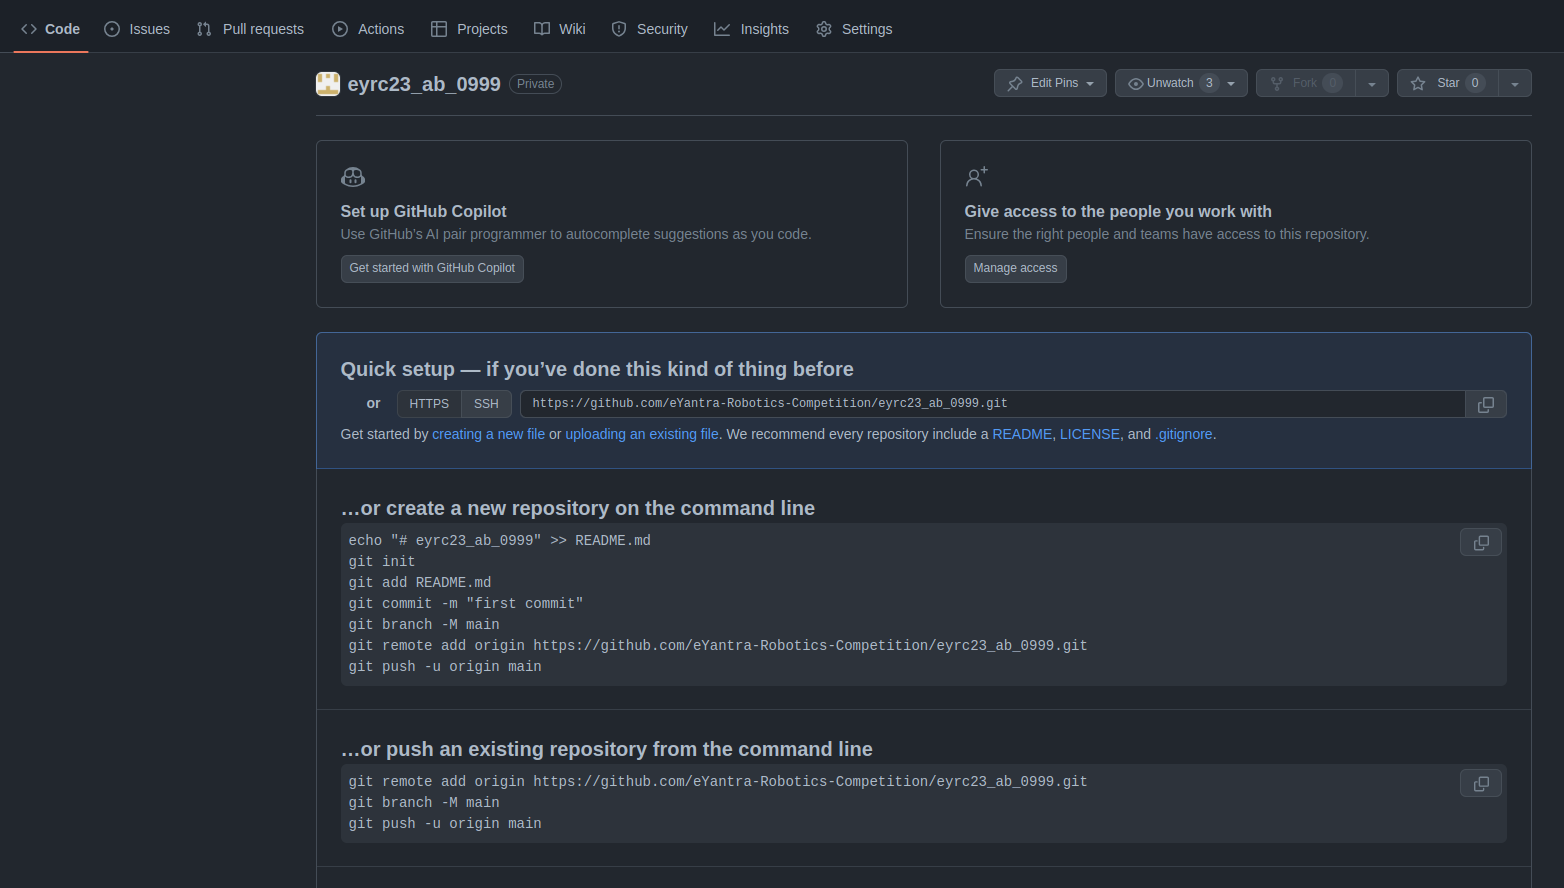
- To add collaborators click on Setting -> Collaborators and teams -> Add people as shown below.
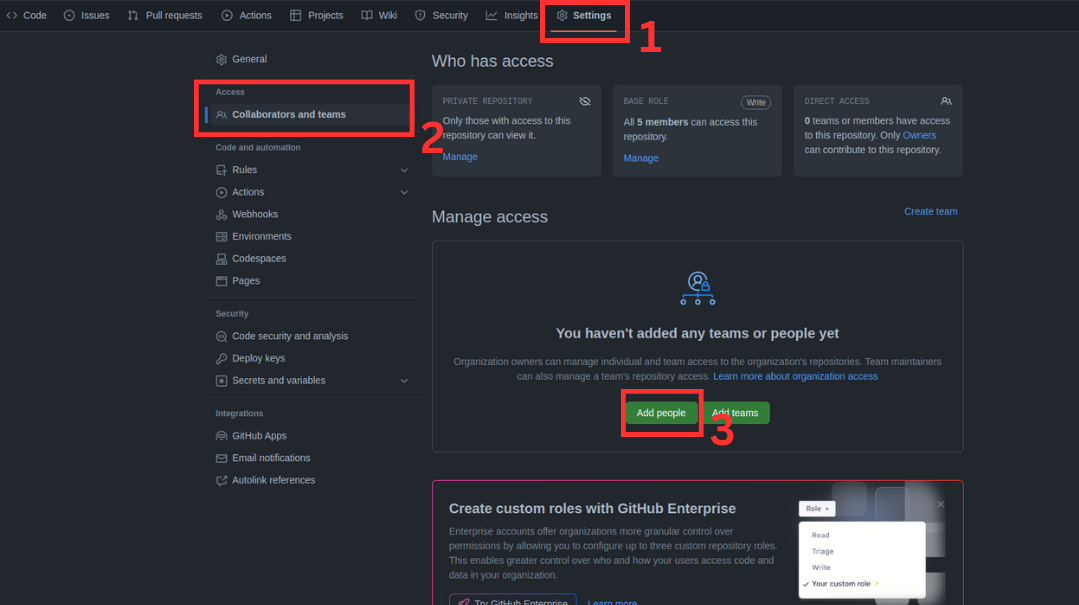
- First and foremost you can add all your team members
- Also add e-Yantra’s GitHub username: eyantra to the repository with read access.
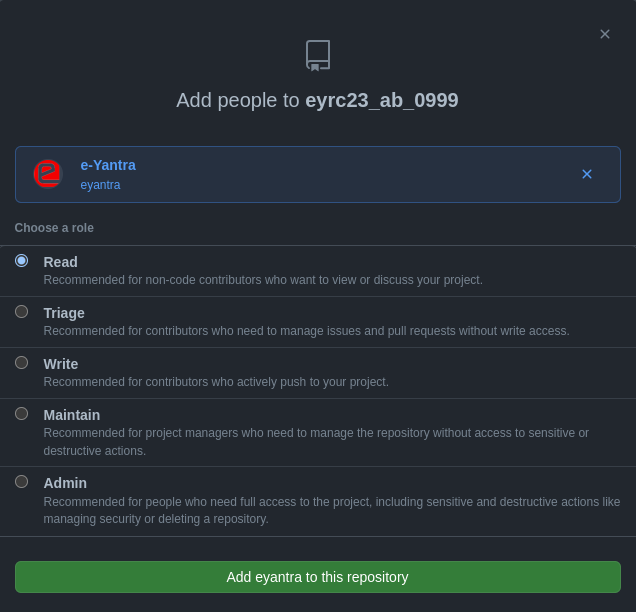
Linking Local and Remote Repository
-
Now as Github setup is ready. Lets see how we can link our local and remote repository.
-
Navigate to you Local repository on your system
-
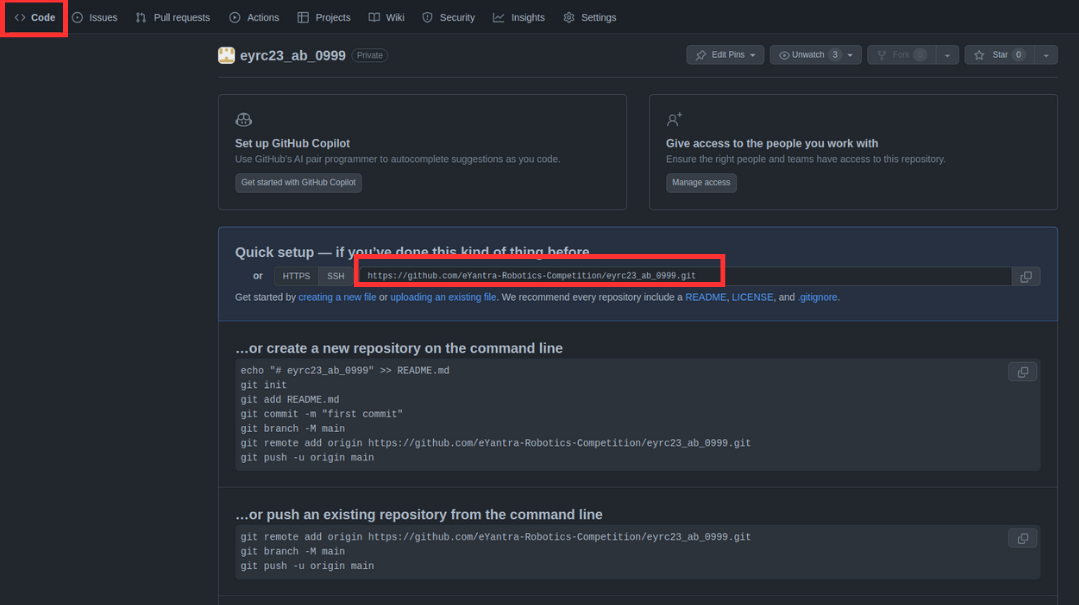
Connect to remote repository using:
git remote add origin <remote-url>You can find the remote url by clicking on Code on GitHub's repo page. Refer following image to see where exactly can you find the url:
-
Since the local changes are already commited, we can now push changes to remote repository using command:
git push origin mainNote: When you push anything to your remote repository, your GitHub account password will not work. Instead, you will need to add a GitHub Personal Access Token in place of your password. To learn more about what a GitHub Personal Access Token is and how to create one, please visit the following website: GitHub Personal Access Token Creation Guide.
All your local files and folders for eYRC Theme have been updated into the Remote Repository. Now you can collaborate and start working as team to complete your eYRC tasks and assignments effectively.
What Next???
It is crucial that each team member actively participates in the tasks and engages in collaborative efforts through GitHub. Keep in mind that there are potential incentive points your team can earn based on the level of active collaboration within the repository.
Henceforth, we will closely monitor the activity on your GitHub repository, and this data will play a significant role in the subsequent stages of the competition. Therefore, ensure that you consistently commit changes to the repository and maintain it effectively to maximize your team's performance.
To know more about how to collaborate using Git and GitHub, refer the following video:
Things to Note:
Following are few things to note when you work with git and GitHub
- All the other team members can clone the remote repository onto their local machine using
git clone <remote-url> - After cloning the repository, all team members can commence work on the project. However, there's a crucial consideration: what if a file that has been updated by one team member is also updated by you? In such a scenario, someone's efforts could potentially go to waste. To prevent this, it's advisable to make it a habit to regularly pull the latest changes from the remote repository using the command
git pull origin main - Check Status: View status of your changes using command
git status
